
Creating Animations with Foto Master Creative Studio AI
Foto Master Creative Studio lets you build custom animations directly inside Foto Master Cloud and add them to your workflows.
To get started, log in to Foto Master Cloud, go to Presets, and select your FMX version (Windows or iPad).
From the Workflow tab, click New Workflow.
Setting Up Your Animation Step
- In the Workflow Builder, add a Single Animation from the Steps Library.
- Click the Gear icon ⚙️ on the step and choose Select an Animation.
- Open the Create with AI tab.
You'll work through up to three stages: generating an image, turning it into an animation, and optionally adding a voiceover.
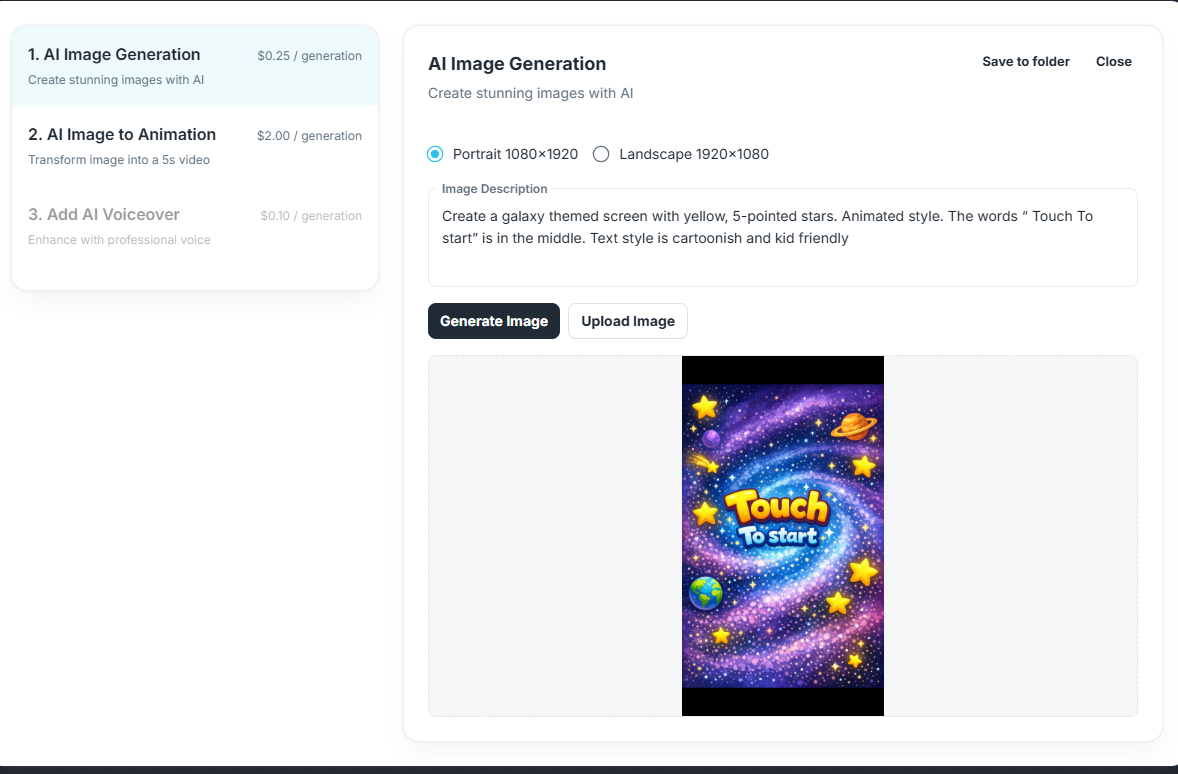
Stage 1: Generate Your Image
This is where you create the image that will be animated.
- In the Image Description box, describe the image you want.
💡 Tip: Including a more detailed description, such as theme and styles, will lead to better results.
- Choose an image size based on where it will appear:
- Landscape for wide or horizontal layouts
- Portrait for tall or vertical layouts
- Click Generate.
The image usually takes about a minute to create. Once it's ready, the tool will move you to the next stage automatically.
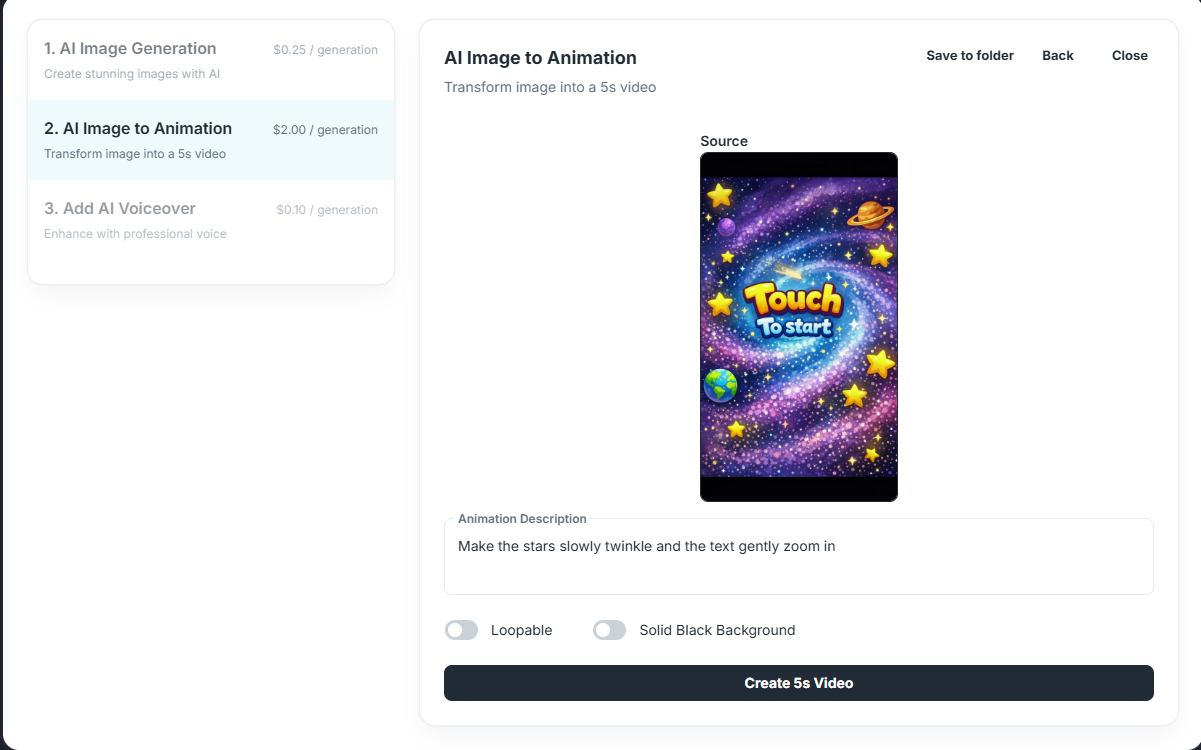
Stage 2: Turn Your Image into an Animation
- In the Animation Description box, describe how you want the image to move.
💡 Tip: Tip: For best results:
- Mention which part of the image should move (e.g., the background, the text, a specific object)
- Describe the type of movement — zoom, float, spin, glow, bounce, etc.
- If there are multiple elements, describe each one separately.
- Keep it short and specific.
- Loopable: Enable this option if you want your animation to play on repeat. When turned on, the AI will generate the animation with a seamless loop in mind.
- Solid Black Background: Enable this option if you want to replace the background of the animation with black
- Click Create 5s Video to start generating the animation.
- Once the animation appears and you're happy with it without voiceover, click Download Animation. If not, proceed to stage
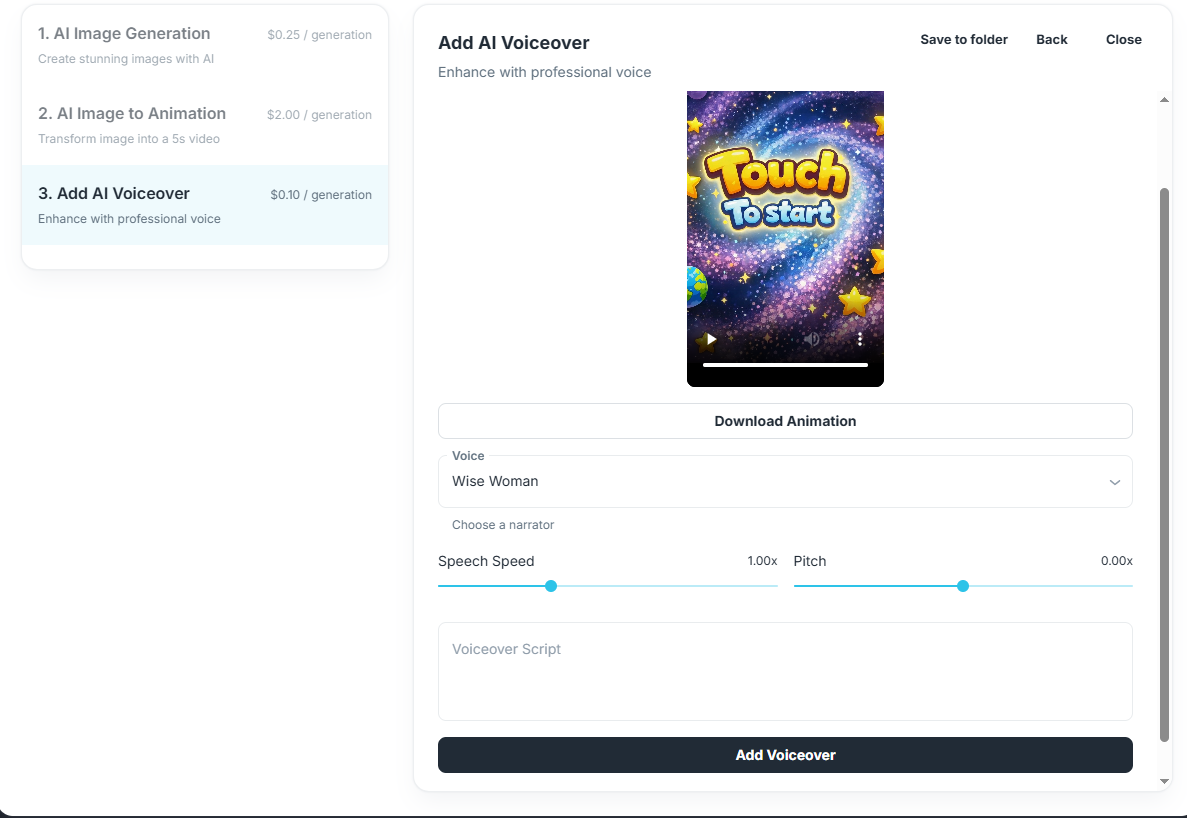
Stage 3: Add a Voiceover (Optional)
You can add a spoken narration to play alongside your animation.
- Type the message you want read aloud.
- Choose your preferred voice from the available options.
- Click Add Voiceover and wait for it to finish generating.
- Click Download Animation to save the final version with audio.
Adding the Generated Animation to Your Workflow
- Go back to your Single Animation Step in the Workflow Builder.
- Click the Gear icon ⚙️.
- Upload your downloaded animation to My Assets.
- Select it to apply it to your workflow.
Your animation is now ready to use.
FAQ
Why doesn't my animation look like what I described?
AI generation is interpretive — it doesn't always produce an exact match to your description. Try rewording your prompt with more specific details about the movement, elements, or style you want. A little trial and error is normal.
How long does it take to generate an animation?
Most animations are ready within a 5-7 minutes, depending on the complexity of your request and your internet connection speed.
Can I regenerate an animation if I don't like it?
Yes. Simply adjust your description and generate again. As long as you have sufficient AI Credits, there's no limit on how many times you can try.
Do I have to add a voiceover?
No, voiceover is completely optional. You can save the animation and skip the AI voiceover step.
Where does my animation go after I download it?
It would be saved locally on the device you used to generate it and downloaded. To use it, Upload it to My Assets inside your Animation Step, then select it to apply it to your workflow.
I don't want to download my animation just yet. Can I save it for later?
Yes. At any stage, click Save to folder and it will be saved to your Foto Master Cloud under Assets → Creative Studio for whenever you're ready to use it.
Was this helpful?
Related articles
Managing Your Event List
Managing Your Event List If you created an event with settings you would like to reuse, you can duplicate it instead of starting from scratch. This is useful when you want to keep
Managing Your Cloud Plan: Upgrades, Downgrades, Grace Period, and Cancellation
You can manage your Foto Master Cloud subscription at any time from Cloud > Billing. This article explains how upgrades, downgrades, cancellations, and the grace period work. Vi
Event Settings
Every event in Foto Master Cloud has a comprehensive set of configurable settings that control how your booth operates, how photos are shared, and how the gallery is presented. Thi
Customizing Your Online Gallery
Your online gallery is often the first thing guests see after their booth experience, and it's a direct reflection of your brand. Foto Master Cloud gives you full control over the
Sharing Templates Between Cloud Accounts
Foto Master Cloud makes it easy to share workflows, layouts, and video templates with other booth owners, partners, or the Foto Master support team. This is especially useful when: