
Using the Coin Acceptor
This guide covers Coin Acceptor setup, from calibration to software integration. The Coin Acceptor can be configured to use 3 kinds of different coins at the same time.
Coin Specifications
- Coin diameter: 15mm–32mm
- Atmospheric pressure: 86Kpa–106Kpa
- Coin thickness: 1.2mm–3.8mm
- Working humidity: ≤95%
- Working voltage: DC +12V ±10%, Speed: ≤0.6s
- Working current: 65mA ±5%
- Accuracy rate of identification: 99.5%
- Signal output: pulse
Calibration (Before Sampling)
- Press the Add and Minus buttons at the same time until you see the letter "A" on the LED display.
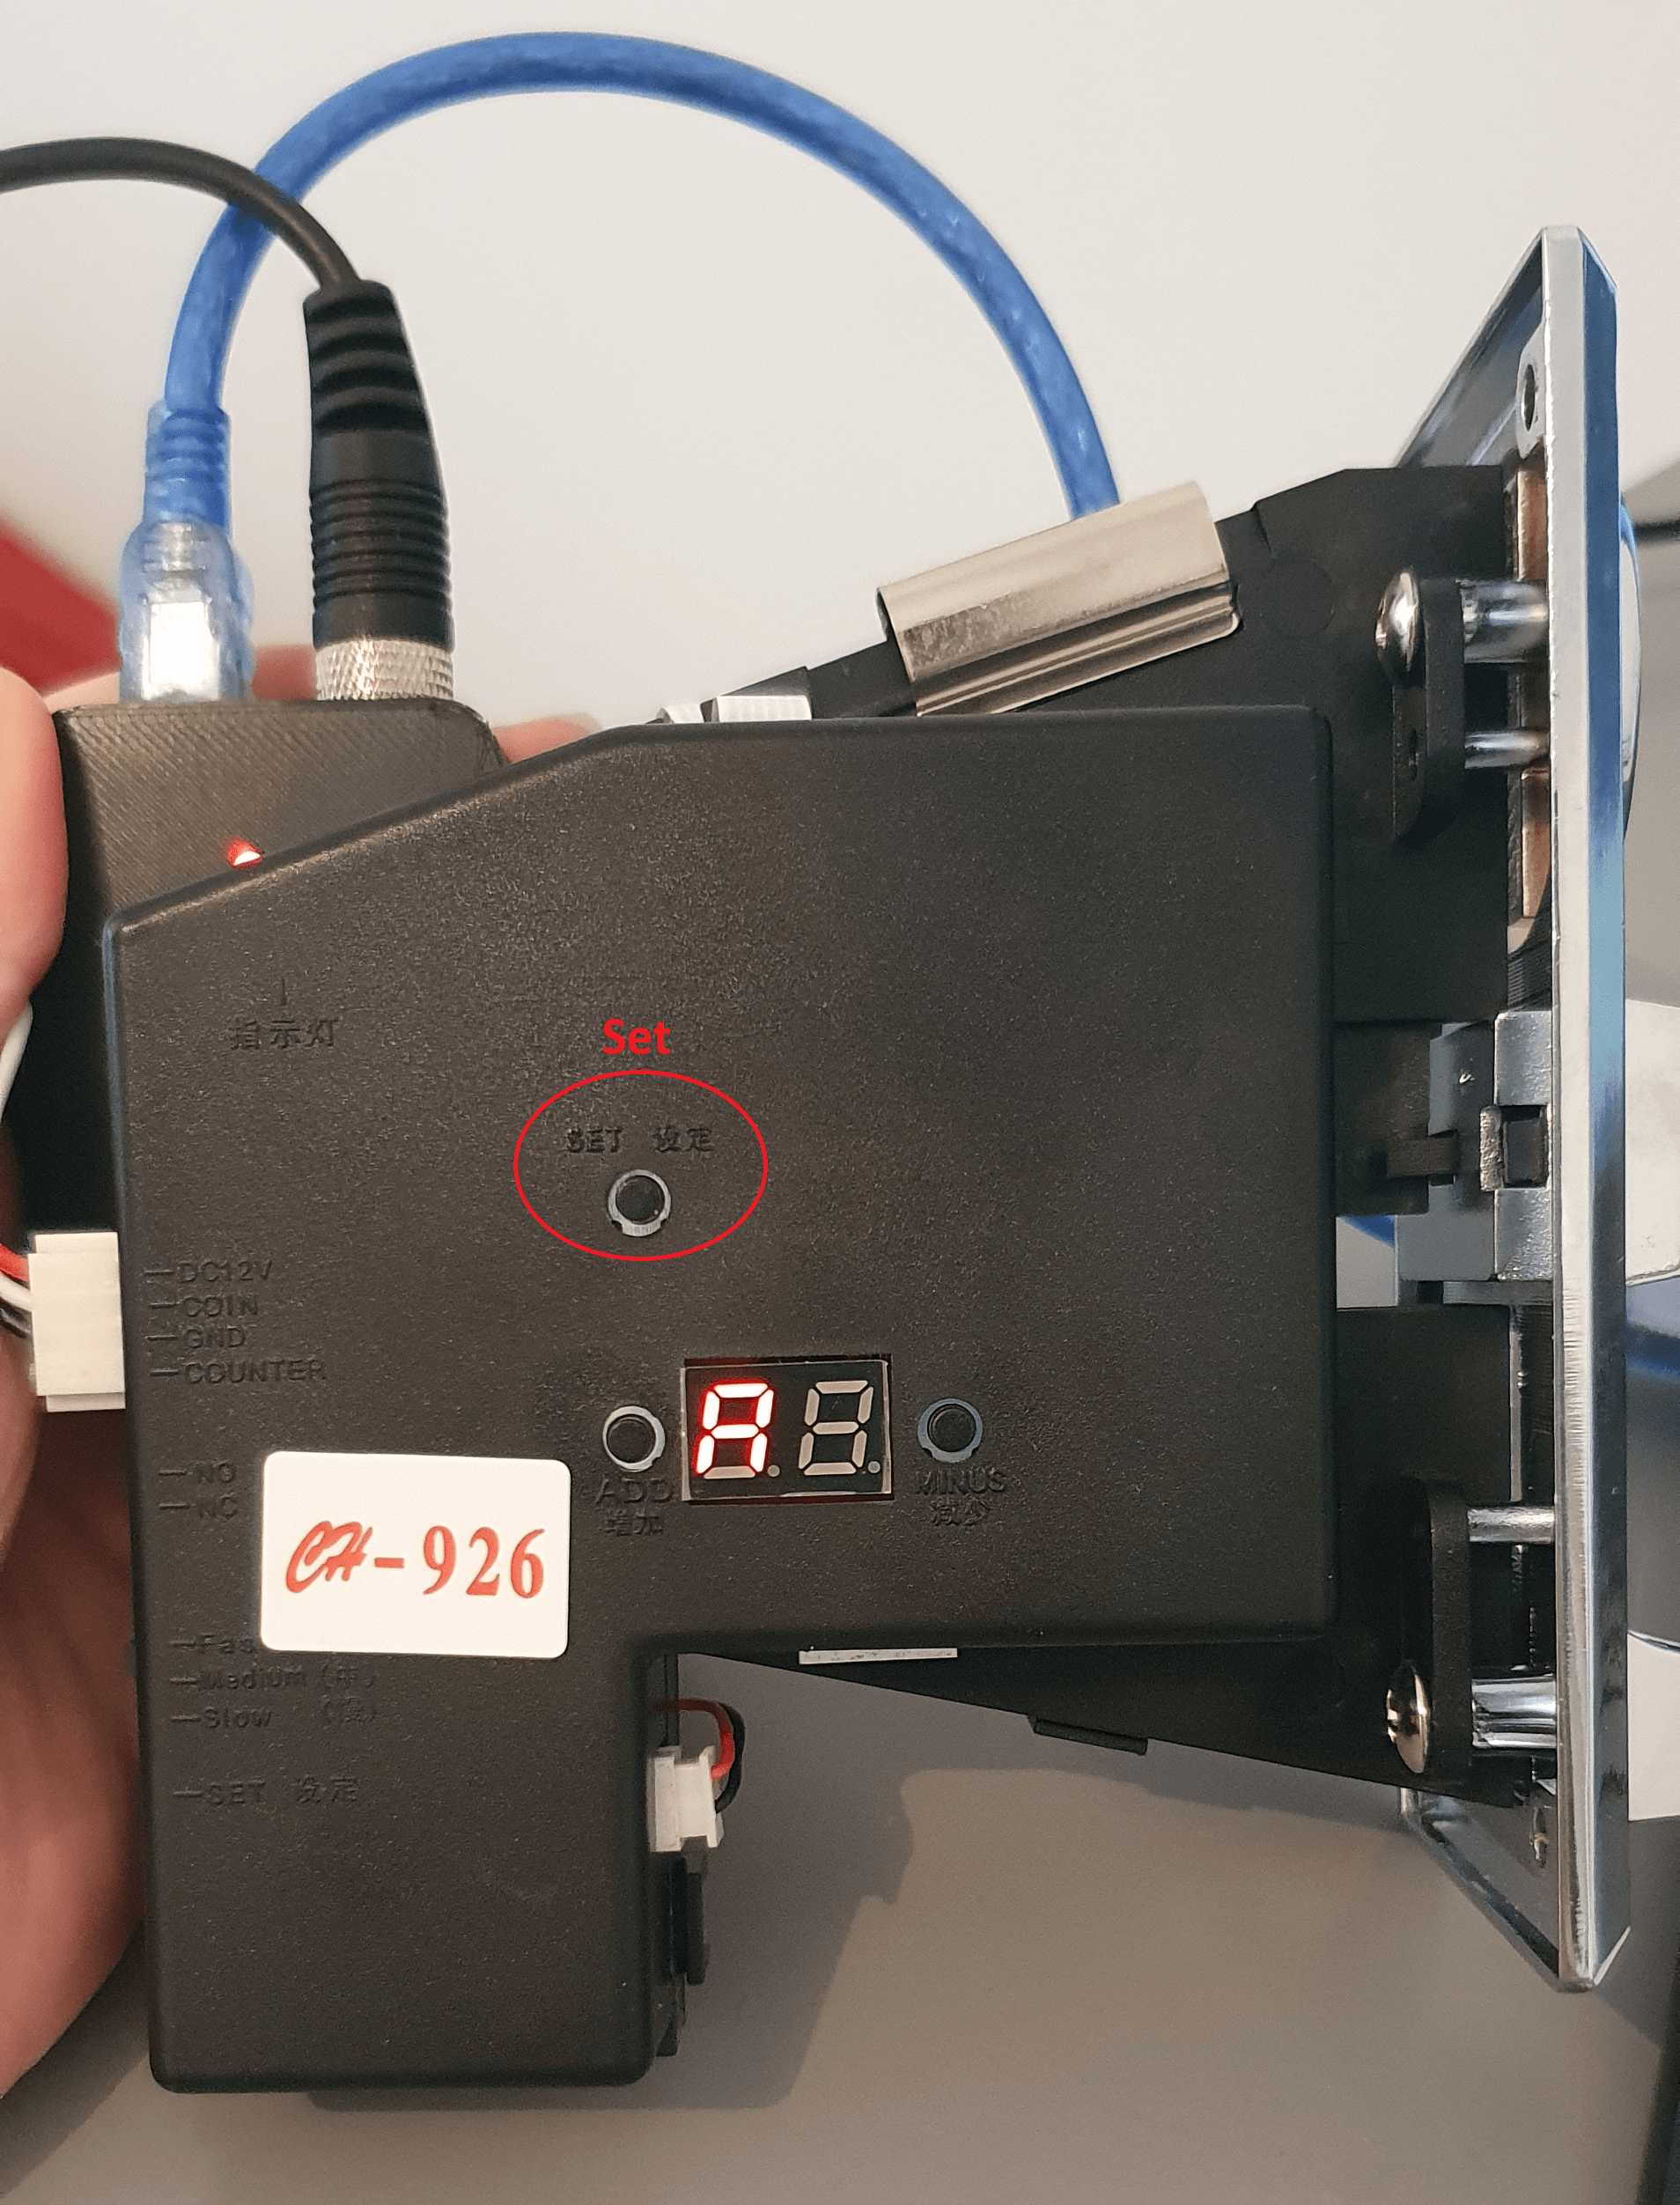
- Press the Set button once. The letter "E" will appear. Use the buttons to choose how many types of coins you want to use. Press Set to finish.
- The letter "H" will appear. Use the Add and Minus buttons to choose how many samples (of the same coin) you want to insert when sampling (recommended to use over 20 coins each). Press Set again to finish.
- The letter "P" will appear. Use the Add and Minus buttons to choose the number of pulses you want the coin to send when inserted (limited to 50 pulses). Press Set to finish.
- The letter "F" will appear after pressing the button. Use the Add and Minus buttons to choose the accuracy. The value ranges from 1 to 30 (1 is the most accurate). The recommended setting is between 5 and 10. Press Set to finish.
- Repeat the steps until you have set up all the coins. The letter "A" will appear again when you're done.
- Press the Set button, the letter "E" will appear. Turn the power off and on. The setup will save.
You can now start sampling. Use at least 20 coins for the sampling process to be accurate.
Sampling
- Press the Set button. The letter "A" will appear on the LED display.
- Press the Set button again. A1 will appear on the LED display. You can then begin to insert your sample coins. The LED display will show a counter of how many coins you inserted. A1 will appear again when you're finished.
- Press the Set button again. A2 will appear to indicate that you can begin sampling your 2nd coin. Repeat steps 1 and 2 until all coins are sampled.
- When you're done sampling, press the Set button. The letter "A" will appear. Turn the power off and on.
Software Integration
- Connect the Coin Acceptor to your computer via USB.
- Open Control Panel → View devices and printers → scroll down to "Unspecified" to see your Coin Acceptor's COM port number.
- In the software, go to the Feature tab → Pay Per Play → Enable Coin-Op, and set the COM Port number according to the Control Panel.
- Define the Pulse Value. The Pulse Value is defined by the Coin-Op calibration and affects the "Next State Trigger" amount. For example: if 1 cent is calibrated as a single pulse (=1) in the Coin-Op device, setting the pulse value to 1 in the features tab and the "Next State Trigger" amount to "100" will require a 1 Dollar payment to proceed to the next state (100 cents = 100 pulses).
Baud Rate: The default Baud rate for the Foto Master Coin-Op device is 300 and should not be changed.
- In your preset's workflow, select the Animation state you want to present before the users place their payment, and set the state's "Next State Trigger" to Payment.
In a typical workflow, you might use an "Insert Coins to Start" animation to start the preset. This means that if the user wants to start the workflow, they need to insert coins.
Coin-related animations are available in the photo booth software folder under Animations/Coins.
- Set the amount you want to charge (in cents).
Was this helpful?
Related articles
Choosing the Right Camera for Your Photo Booth
Your camera is the single most important component affecting photo quality in your booth. Foto Master supports a wide range of cameras from Canon, Nikon, Sony, and USB webcams -- b
Camera Basics for Photo Booth Operators
You do not need to be a professional photographer to run a great photo booth, but understanding a few camera fundamentals will help you deliver consistently high-quality photos acr
FMX Supported Camera List
FMX supports cameras from Canon, Nikon, and Sony via their respective manufacturer SDKs, as well as any UVC-compliant USB webcam. This article provides the full compatibility list,
Camera Basics: The Exposure Triangle
This video explains the exposure triangle — aperture, shutter speed, and ISO — and how each setting interacts to control the final look of your photo. Recommended for operators who
Camera Basics: White Balance Settings
This video explains how different white balance settings affect the color temperature and overall quality of your photos — useful for any DSLR or mirrorless camera used with a Foto