
How to Use the Selection Screen in Selfie Wifi
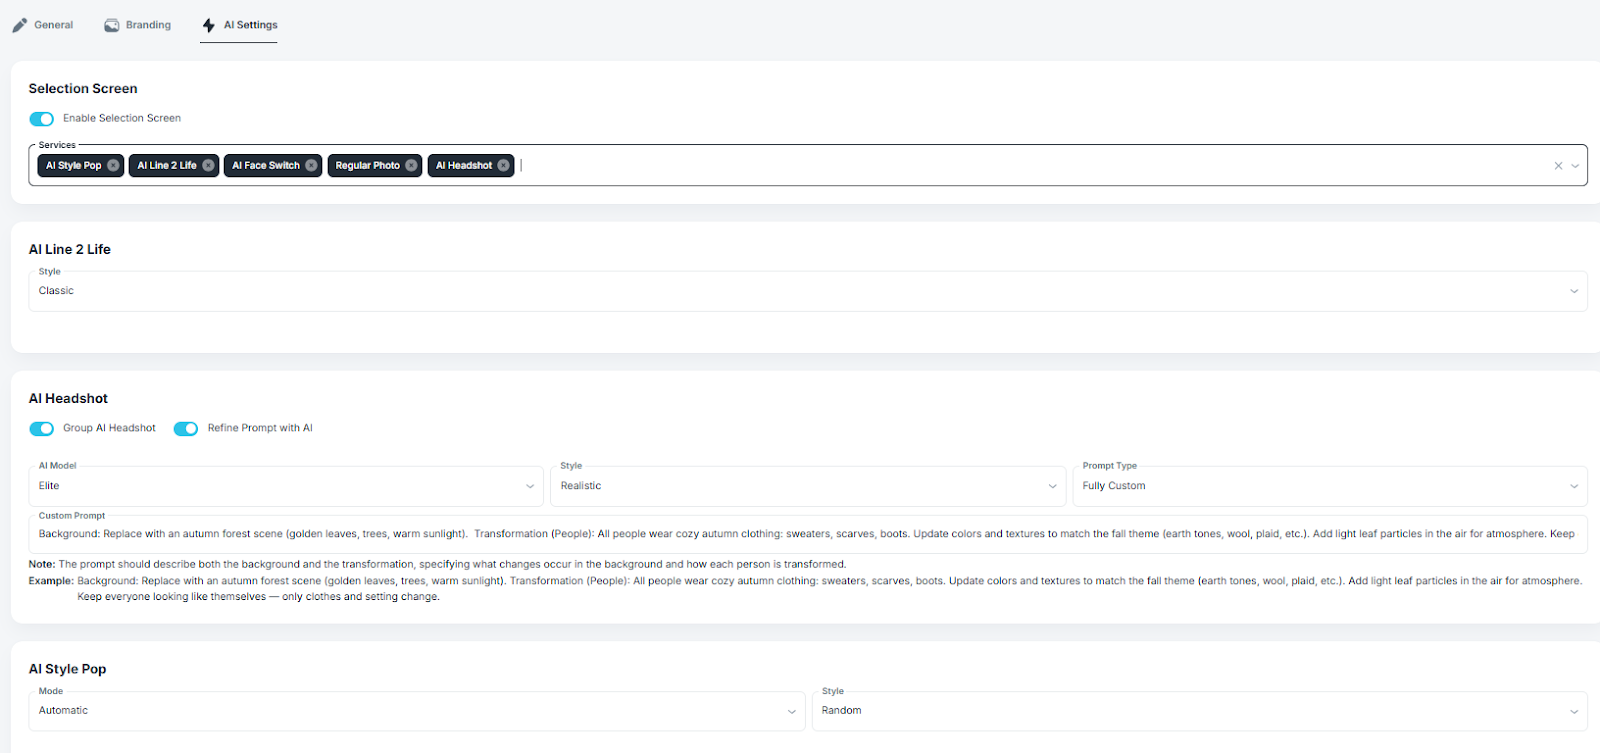
The Selection Screen in Selfie Wifi allows you to offer multiple AI options within a single activation. Guests can choose their own experience — whether through AI Line2Life, AI StylePop, or other creative features — making the experience more personalized, interactive, and fun.
Step 1: Set Up Your Selfie Wifi Template
-
Log in to your Cloud account.
-
Create a new template or open an existing one.
- Need help? See our How to Create a Selfie Wifi Template article
Step 2: Enable AI Settings
-
Open your template and navigate to the AI Settings tab.
-
Toggle Enable AI.
-
Select two or more AI options to include.
-
Click Save.

Step 3: Configure the Selection Screen
-
Under AI Settings, each enabled AI feature will show its configuration options at the bottom.
- If no options appear, that feature works as-is.
-
Adjust the settings for each AI according to your preferences.
-
Click Save to apply your changes.
Guest Experience on the Landing Page
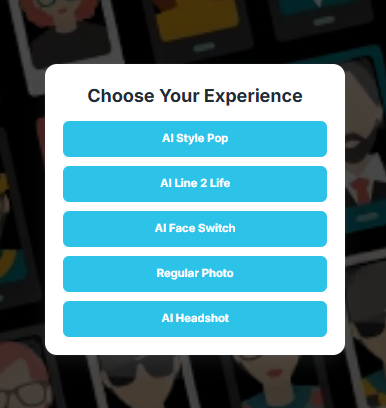
When multiple AI options are enabled, the Landing Page guides guests through the experience:
1. Select an AI Feature
-
Guests tap the button for the AI they want to use (e.g., AI Line2Life, AI StylePop).
-
Only one option can be selected at a time by the guests.
2. Provide Input
-
Photo-based AIs:
-
Upload Photo – Choose a JPG/PNG file from the device.
-
Take Photo – Open the camera, capture an image, then confirm or retake.
-
-
AI Line2Life:
-
Drawing a sketch on the canvas.
-
Use Undo or Clear to make adjustments.
-
3. Review or Change Selection
- Guests can use Back or Change to return to the selection screen and pick another AI before submitting.
4. Submit for Processing
-
Once satisfied, click Submit.
-
The platform processes the input and generates a stylized image, which appears on the screen once ready.
That’s it!
With the Selection Screen, guests can explore multiple creative options and choose the one they love most—whether transforming a photo or sketching something unique. This flexibility boosts engagement and makes every Selfie Wifi activation more memorable and shareable.
When you’re done, don’t forget to link your template to a Cloud Event. For help, see our Creating a Cloud Event and Linking a Selfie Wifi Template article
Was this helpful?
Related articles
How to Use the AI StylePop Feature in Selfie Wifi
The AI StylePop feature lets you transform photos into fun, creative, and fully stylized scenes. Guests can enjoy a variety of pre-made looks or even create their own custom styles
Selfie Wi-Fi Overview
Selfie Wi-Fi is Foto Master's self-service photo experience that lets guests use their own smartphones to capture, enhance, and share photos -- no dedicated booth hardware required
Selfie Wi-Fi: Getting Started
This guide walks you through setting up Selfie Wi-Fi for your first event, from Cloud configuration to having guests snap photos on their phones. Prerequisites Foto Master Cloud ac
Selfie Wi-Fi: Moderation Guide
Content moderation in Selfie Wi-Fi lets you review and approve guest photos before they appear in galleries, on slideshow displays, or in print. This is essential for public-facing
How to Use the Selfie Wi-Fi Software
Hi Foto Master Family, This guide walks through the Selfie Wi-Fi software — from initial setup to running a live activation. Note: This guide covers the Selfie WiFi Software, which